
Knowing how to repair a window seal can certainly come in handy if you live in a humid place like Singapore. Over time, window seals can get damaged due to mould and excessive humidity. Damaged window seals can let in moisture from the outside, making the room uncomfortable. The moisture from the outside can also mess up the temperature in the house. Such problems are common if window seals aren’t working as they should.
Thus, fixing a broken window seal is essential to improving your house’s living condition. With this point in mind, we have devised the perfect guide to repair a broken window seal. We will discuss the causes of broken window seals and the correct methods to deal with them.
Types Of Window Seals
In modern homes, you can find about four significant types of window seals, which include. LS Window Repair Services Singapore explains the complete process of repairing a window seal Singapore. Moreover, their window repair, window rivet replacement, and pane replacement services stand out in the competitive commercial market of Singapore
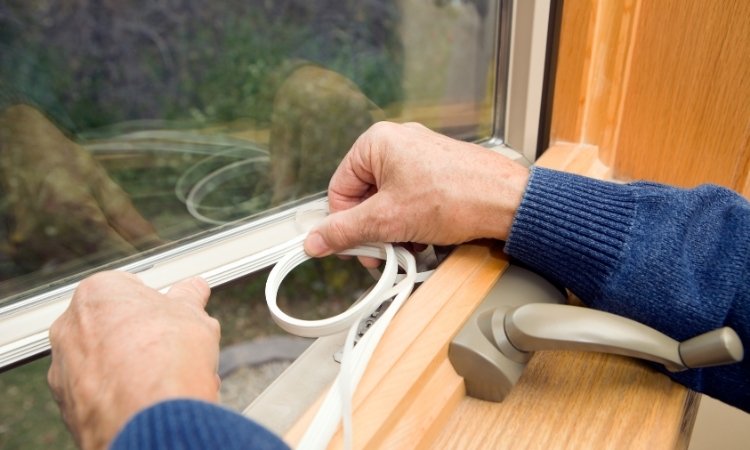
- Weatherstripping – Such seals are made of a flexible material like rubber or foam. This material covers the openings between the windows and the walls and keeps moisture out.
- Caulking – Caulk is a popular sealant that covers the spaces between the window frame and the wall.
- Gaskets – These are flexible materials that can work great as a sealant.
- Silicone Sealants – These are very durable and flexible sealants that can work great for indoor and outdoor use.
Common Causes Of Broken Window Seals
Singapore’s humid climate can undoubtedly put a toll on window seals. Some of the most common causes of broken seals include
- Humidity – Excess humidity in the area can cause wear and tear of the sealant material. The moisture stiffens and cracks the seals and makes them age faster.
- Sunlight – The UV rays from sunlight can weaken sealant materials and cause them to fail early.
- Temperature – Excessive changes in temperature from hot to cold can also weaken the seals. In drastic temperature changes, the seals can expand and contract too much. This decreases their lifespan and causes them to break and crack.
How To Repair a Window Seal
Here is the step-by-step guide to repair a window seal and protecting your house from the humidity.
1. Inspect The Seal
Before you begin the repair process, you must know the exact cause and site of breakage. Inspect the seals from all sides and look for any signs of damage like cracks, breaks, or discolouration. If you have double-glazed windows or HDB windows, check for any signs of condensation between the panes.
2. Remove The Damaged Seal
Once you know the issue you are dealing with, you can start the repair process. In the first step to fix a window seal, you must remove the old damaged seal. Use a utility knife and gently scrape away the old seal from all sides of the frame. Be careful with the knife to avoid scratching the window panels or the frame.
3. Clean And Prepare The Area
In the next step for window seal repair, you should clean the area to apply the new seal properly. You can use alcohol or soap, water, and a cloth to clean the area and remove any dirt or debris gently.
Once the area is clean, use a microfiber cloth to dry it. Once the sides of the panel are dry, use masking tape on both sides of the gap. This will help you apply the sealant in a clean, straight line.
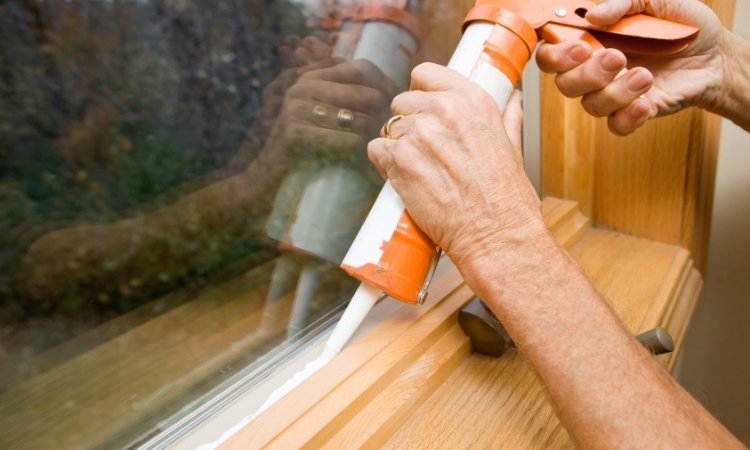
4. Apply New Sealant
Fill a good amount of sealant into the caulking gun. Run the gun through the gap between the window and the wall and apply a uniform sealant layer. To create a neat finish, smooth the sealant with your finger or a caulking tool. Apply a good amount of sealant and prevent any breaks to get a good finish.
5. Allow To Cure
Give the sealant some time to cure according to the manufacturer’s instructions. Avoid touching the sealant during this time. Let the window remain closed as well, and don’t disturb it. Disturbed sealants can break, which can let the moisture in.
6. Remove The Masking Tape
Once the sealant has been set, you can remove the masking tape. Clean the area in the end to remove any dirt or debris. Inspect the final finished layer and make any additions to the sealant if necessary.
Conclusion
The complete process to repair a window seal is quite an easy DIY project. You don’t need to call any professionals to help you with the process. Removing the old sealant, cleaning the area, and applying the new sealant layer are all the steps you need to do.
The whole project will hardly take more than thirty minutes. The newly applied sealant will take some time to set (24-48 hours). Once applied, the new sealant will protect the house from excessive humidity and other materials from outside.